FAQ
Here are some frequently asked questions about shop
| S.No. | FAQ |
|---|---|
| 1 | Syncing with Shopify |
| 2 | Syncing Products from Shopify |
FAQ DETAILS
Here are details about faqs
Once you have been approved as a seller on Alma Mater, you will be able to connect your Shopify store to Alma Mater. Below are directions to sync between Shopify and Alma Mater
Confirming Access
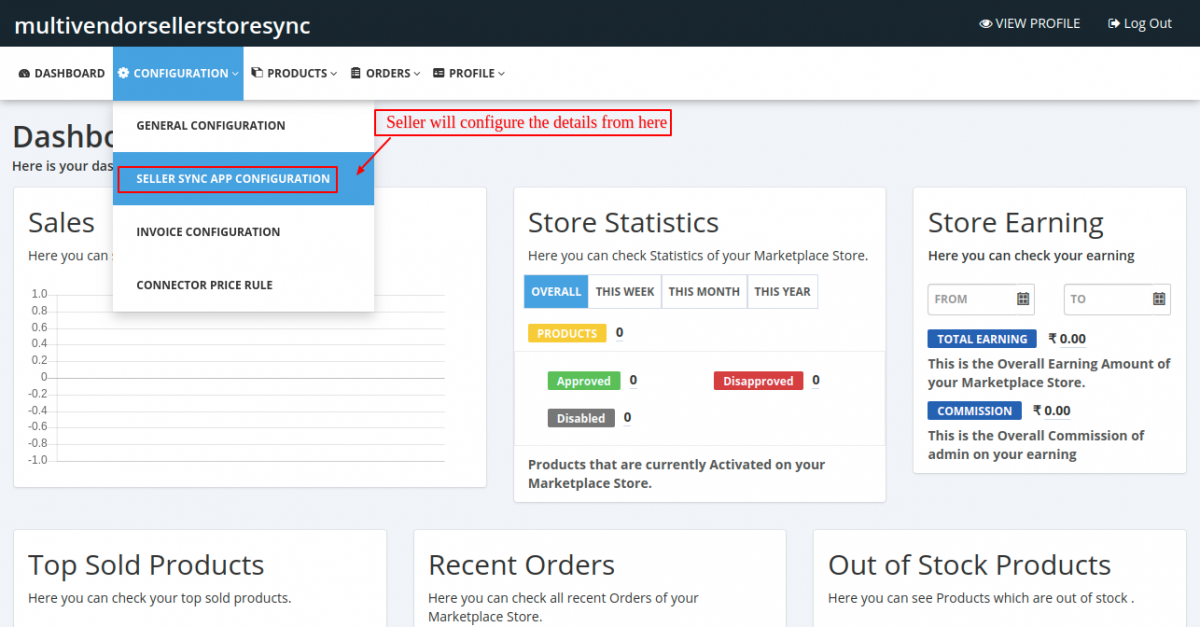
First, confirm that you have the proper access. Go to the Configuration tab. You should have the option for 'Seller Sync App Configuration'. If you do, continue to the next steps.

Shopify Steps
Step 1: Log in to your Shopify store.
Step 2: Click on Settings.
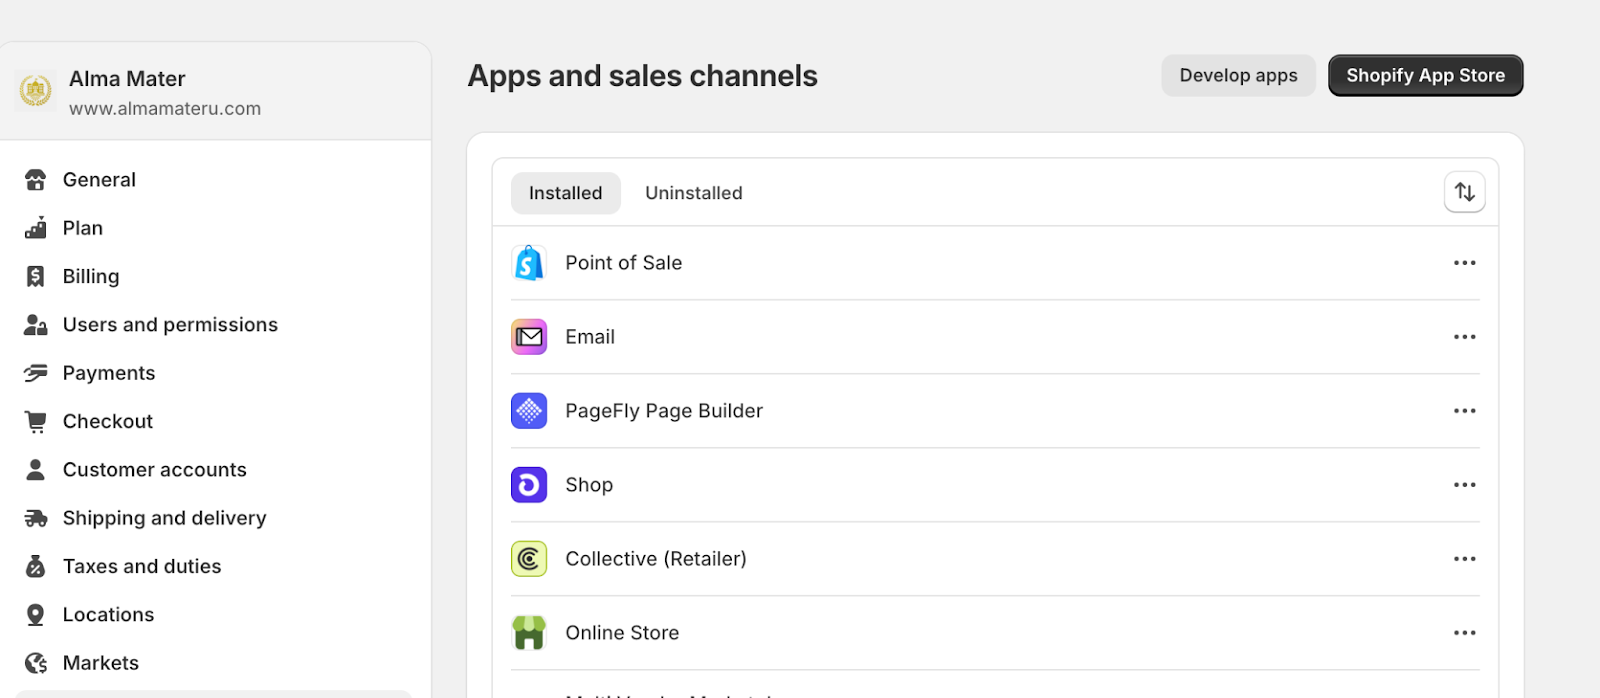
Step 3: Click on 'Apps and sales channels'.
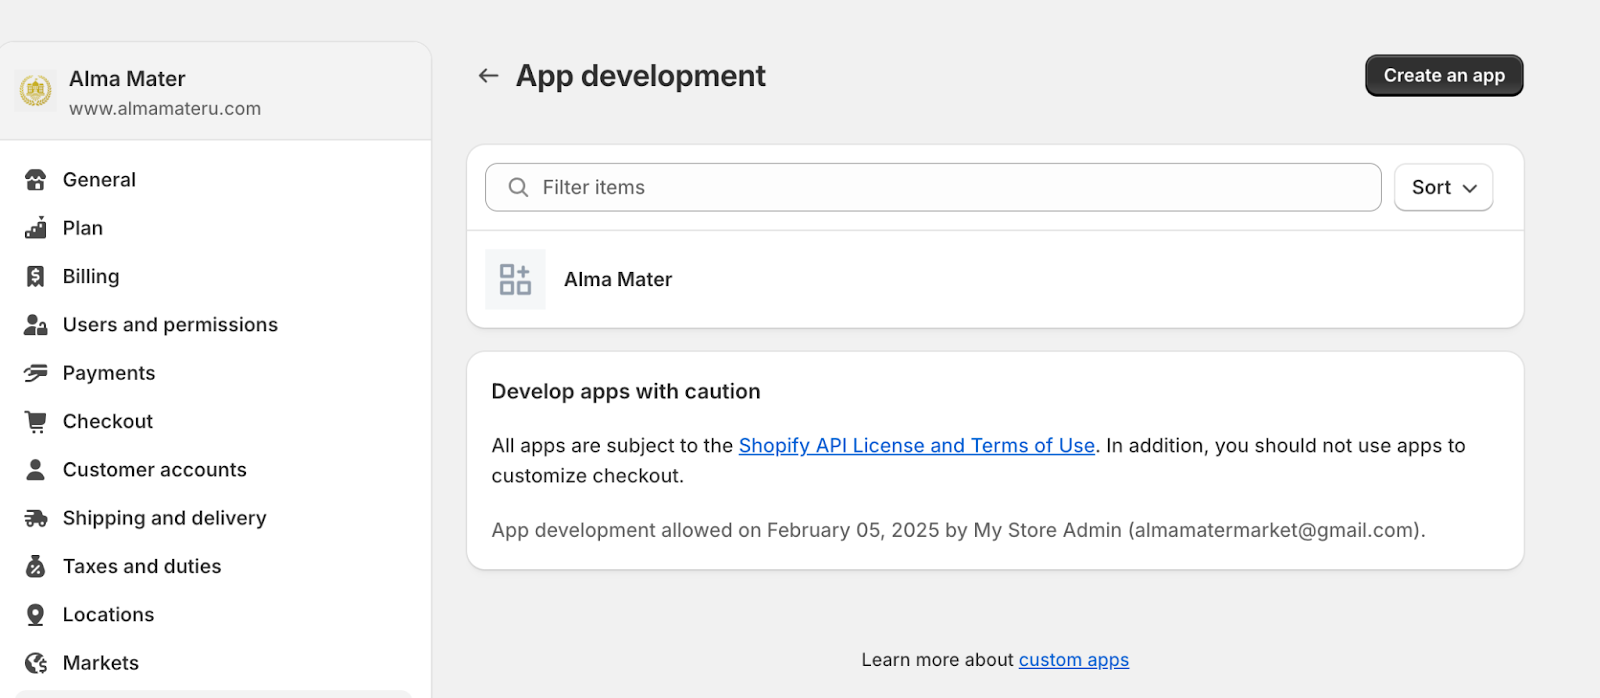
Step 4: Click on 'Develop apps'
Step 5: Click on 'Create an app'.
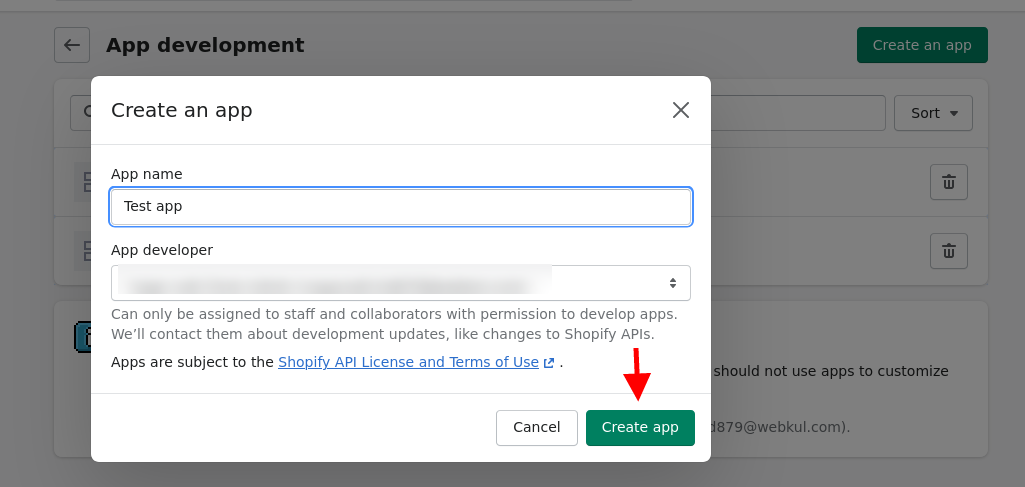
Step 6: Give a name to the app (ex. Alma Mater) then click on 'Create app'.
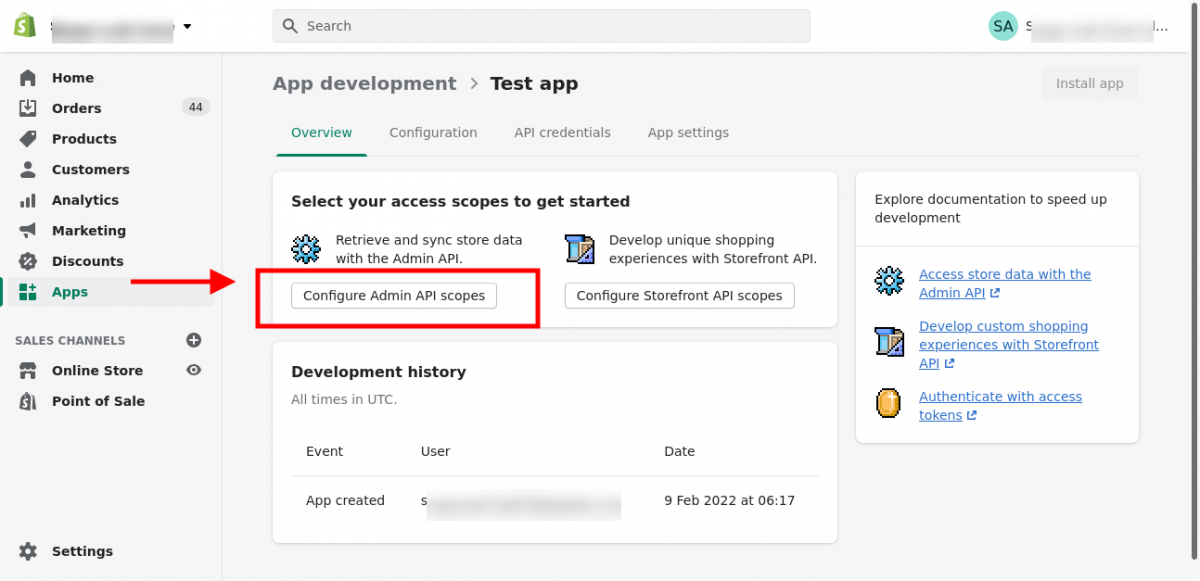
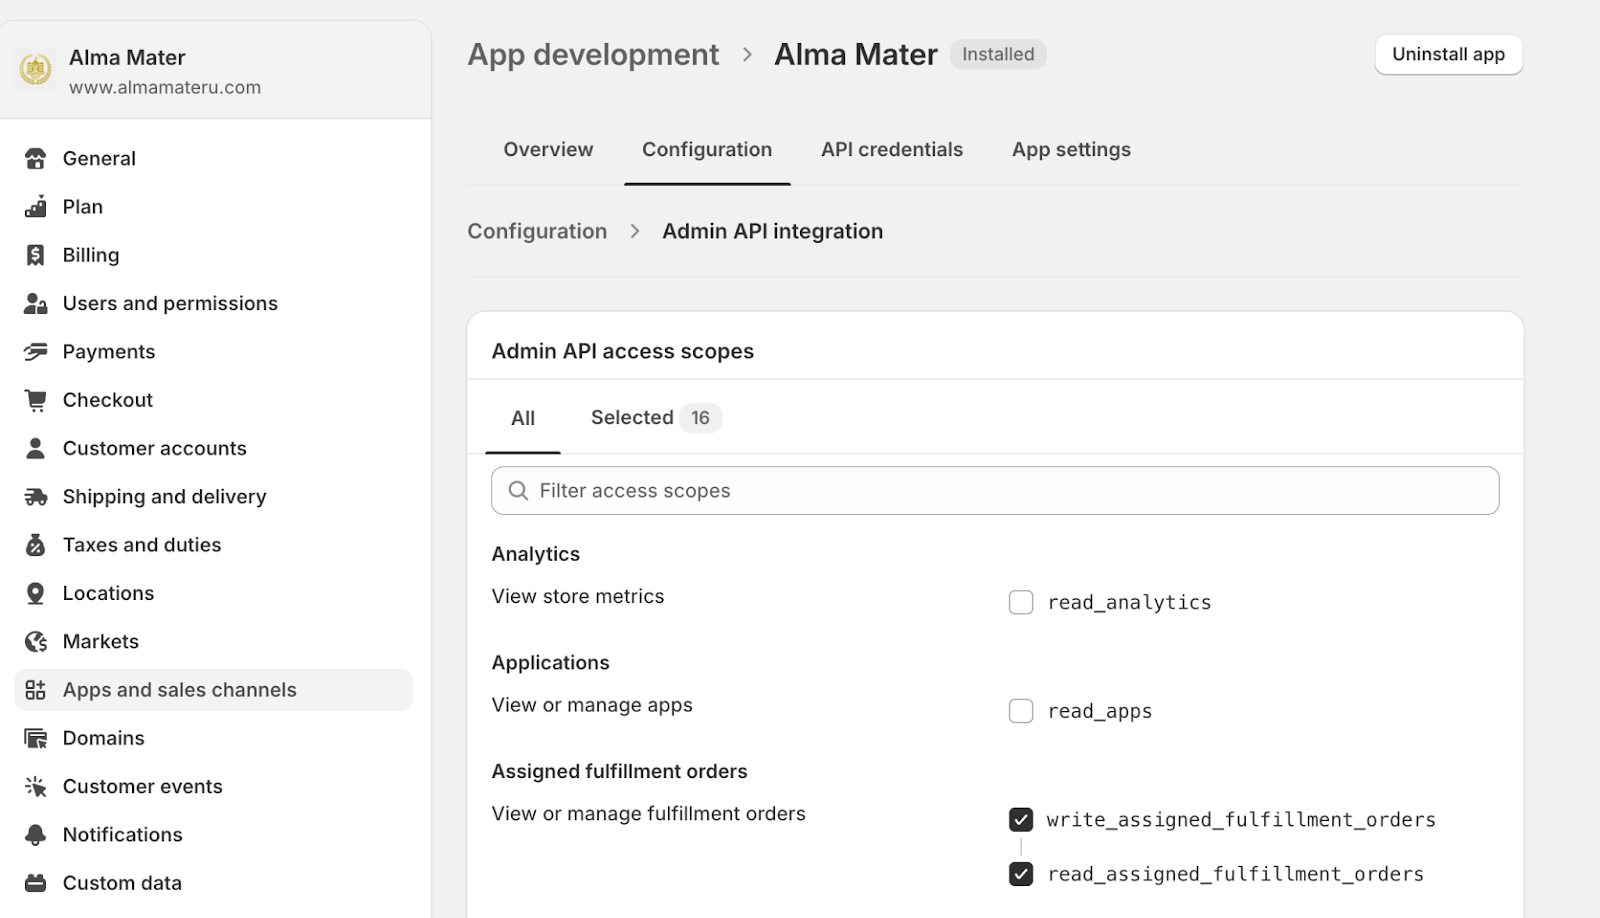
Step 7: Click on “Configure Admin API scopes”.
Step 8: Scroll through and check off the following boxes (16 total).
-write_assigned_fulfillment_orders
-read_assigned_fulfillment_orders
-write_fulfillments
-read_fulfillments
-write_inventory
-read_inventory
-write_locations
-read_locations
-write_order_edits
-read_order_edits
-write_orders
-read_orders
-write_product_listings
-read_product_listings
-write_products
-read_products
Step 9: Once done with the API scopes, click on 'Install app'.
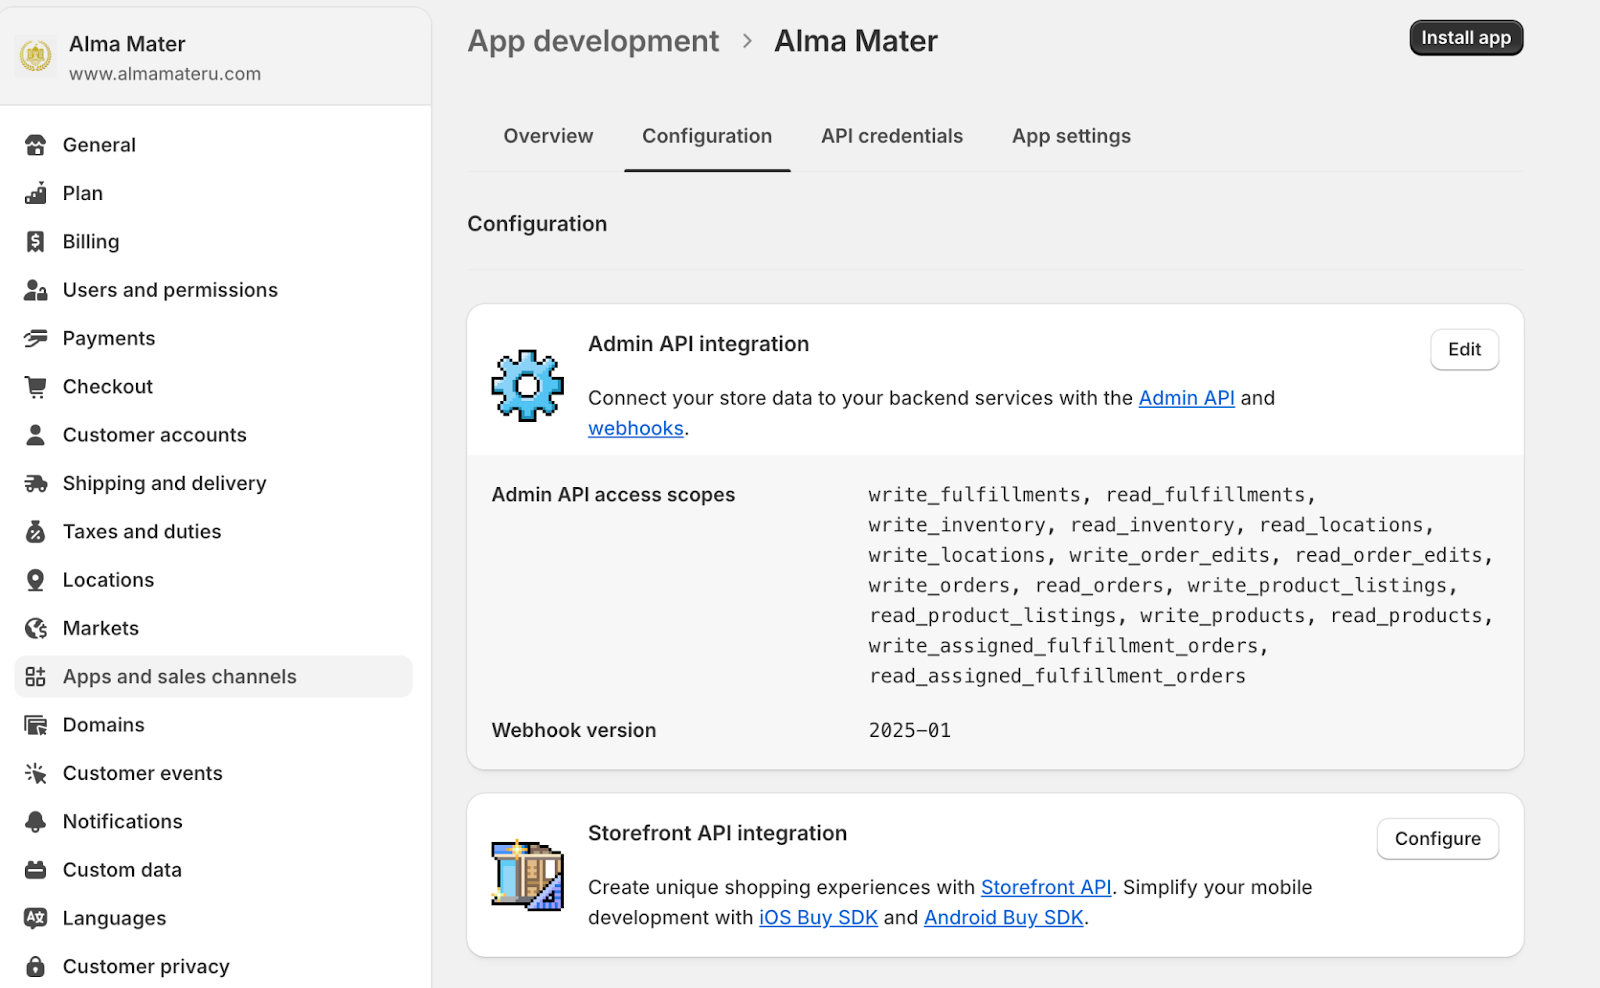
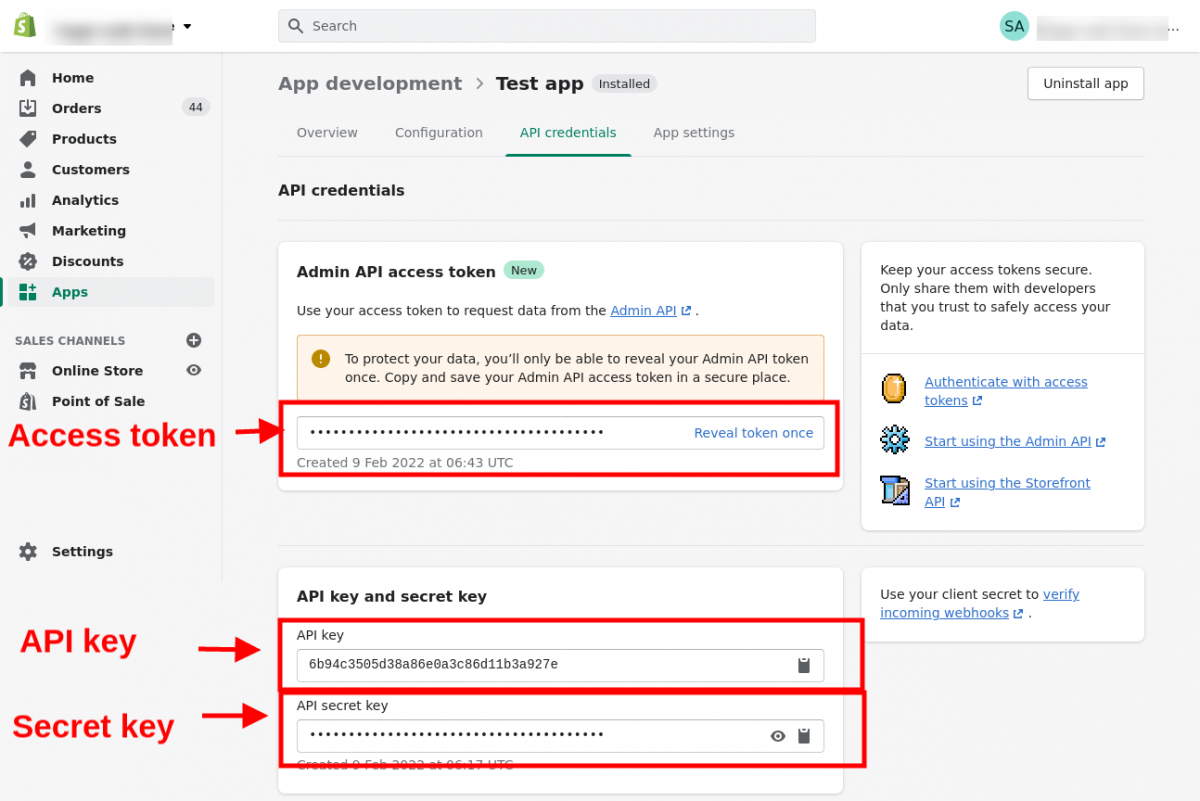
Step 10: Once the app is installed, click on the 'API credentials' tab next to the 'Configuration' tab.
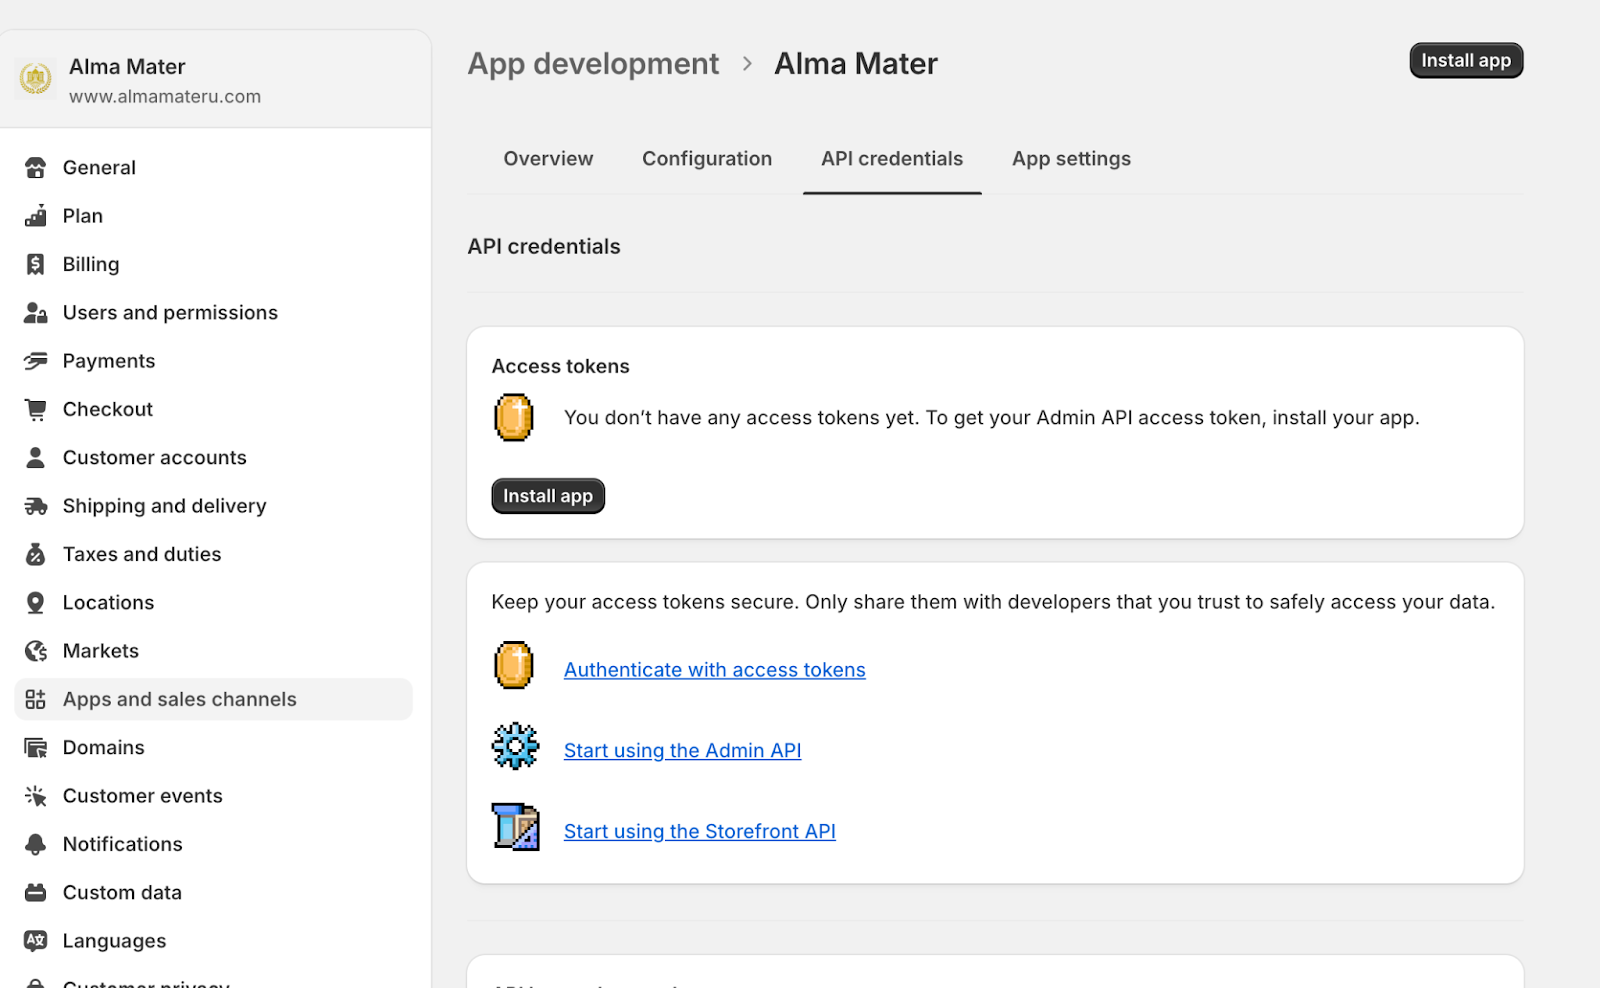
Step 11: Under 'Access tokens', click on 'Install app'. A pop-up box will show. Click 'Install'.
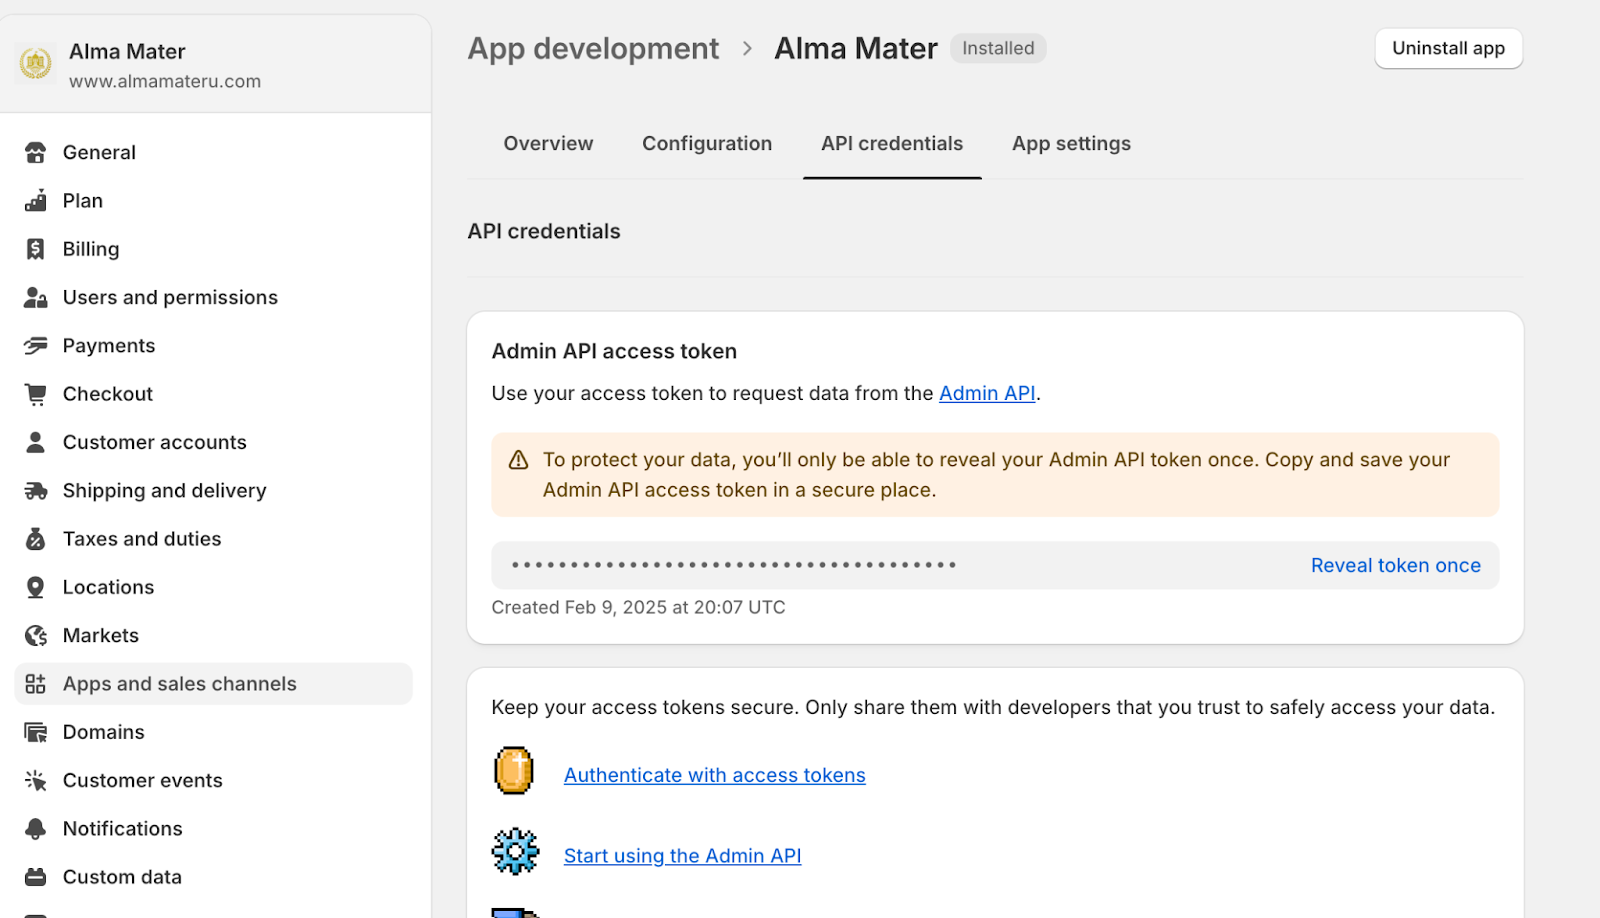
Step 12: You should now have an 'Admin API access token'. You will need this in the next steps.
Connecting to Alma Mater
Step 1: In another tab, open the Alma Mater seller's portal.
Step 2: Go to the 'Configuration’ tab and select 'Seller Sync App Configuration’.
Step 3: Go back to the Shopify tab and copy and paste the corresponding data points to Alma Mater.
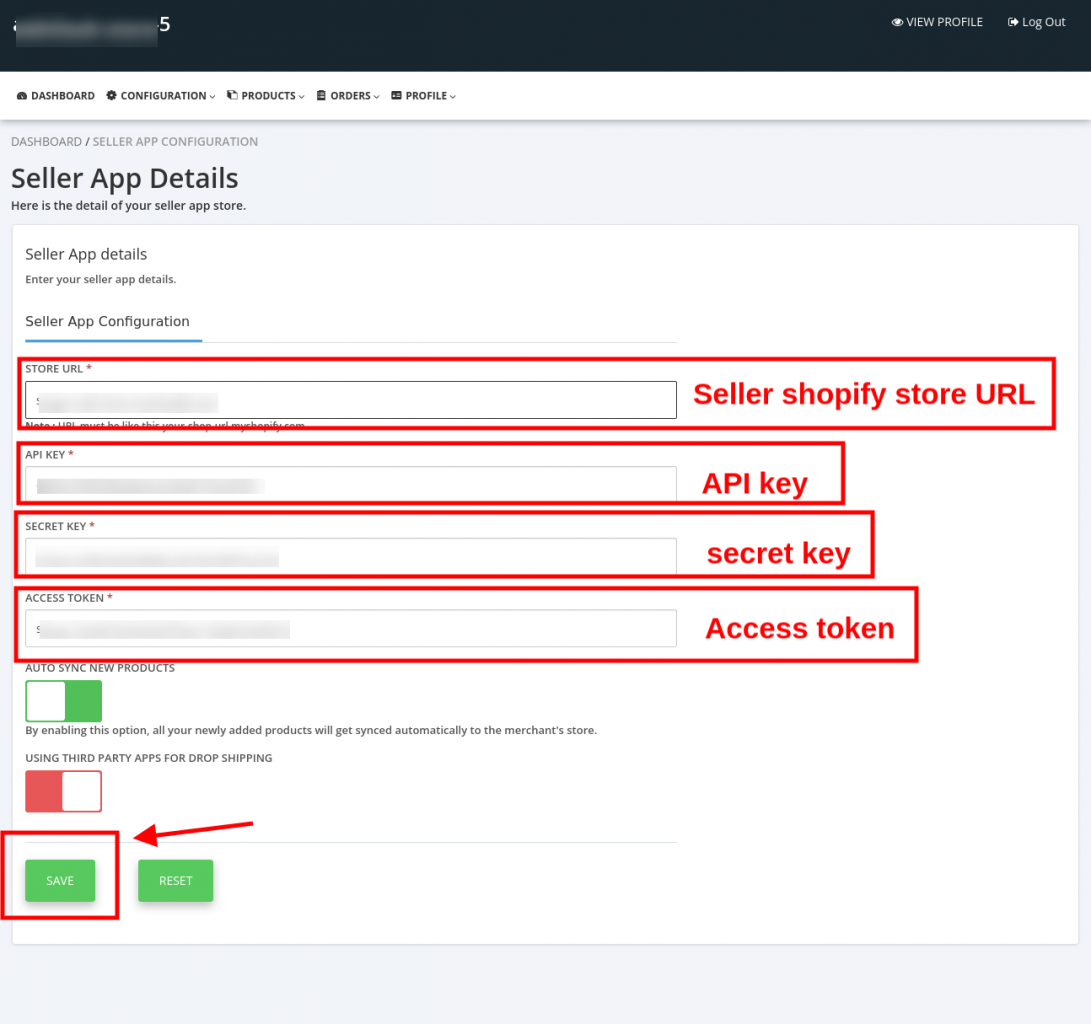
Alma Mater portal^

Shopify store^
Step 4: After the information is entered, click save on the Alma Mater portal. You can close the Shopify tab as well.
Step 5: You can close the Shopify tab as well.
Step 6: Go back into ‘Sell Sync App Configuration’ and scroll down until you see ‘Sync Location’.
Step 7: Toggle on ‘Sync Location’ and check the boxes for the locations you will be shipping inventory from.
Step 8: Click ‘Save’.
Syncing Products
Step 1: Until ‘Seller Sync App Configuration’, you will see buttons at the top right.
Step 2: Click on ‘Import Products’
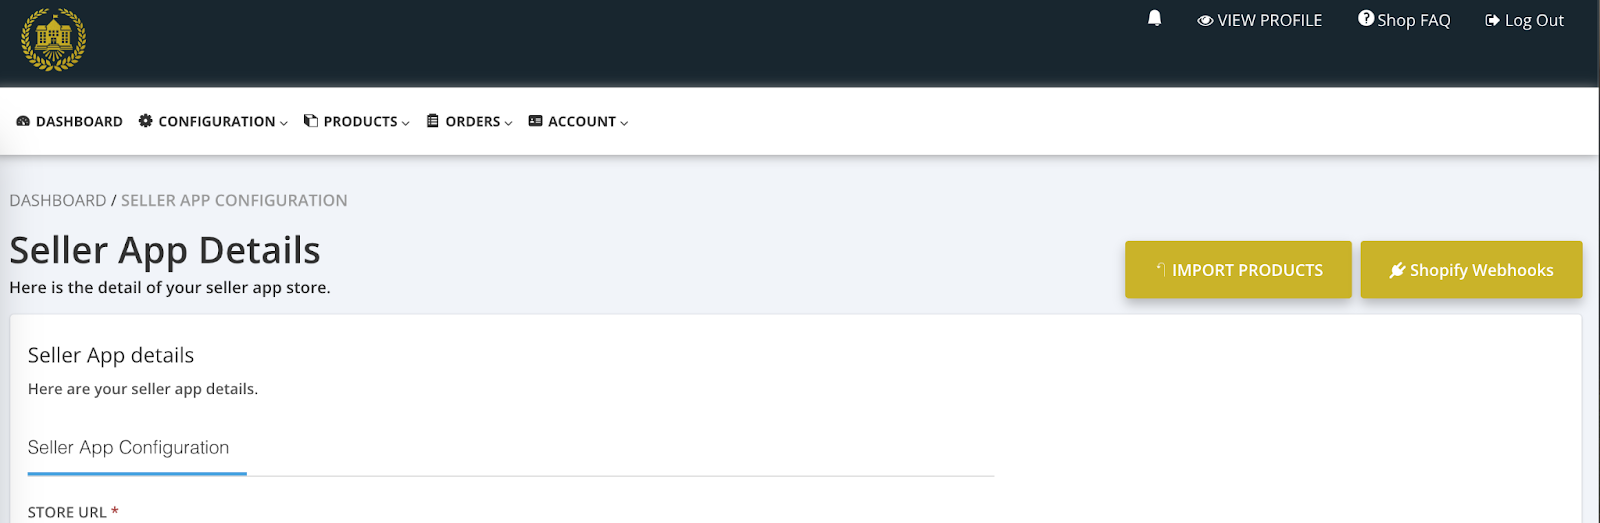
Step 3: Enter in date ranges for the products you want to import into the Alma Mater portal. Then click ‘Import Products’
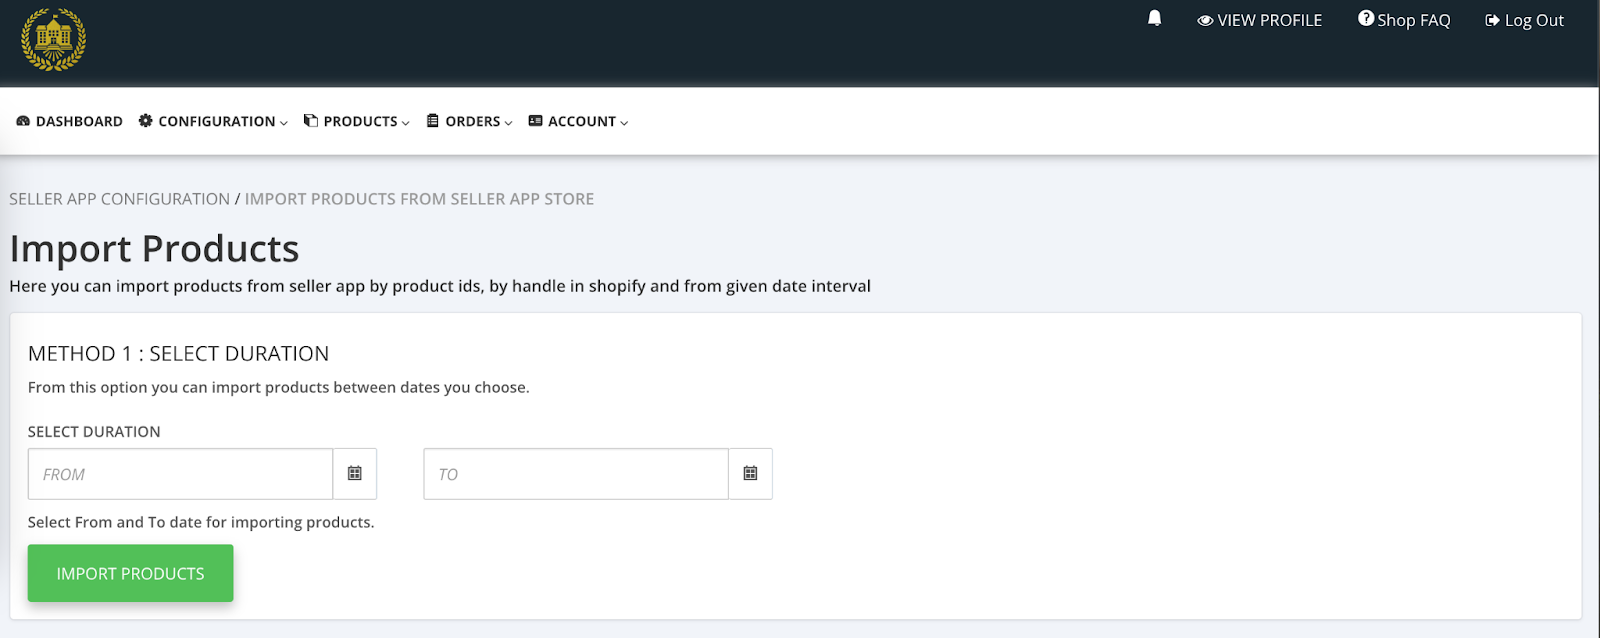
Step 4: The process of syncing products will begin. You’ll see the products update under ‘Products’ tab > ‘Products Listing’.
Note: You must already have the custom app activated for this feature to work.
Syncing Products
Step 1: Until ‘Seller Sync App Configuration’, you will see buttons at the top right.
Step 2: Click on ‘Import Products’
Step 3: Enter in date ranges for the products you want to import into the Alma Mater portal. Then click ‘Import Products’
Step 4: The process of syncing products will begin. You’ll see the products update under ‘Products’ tab > ‘Products Listing’.